How to Turn Off Read Only Feature
How to Remove the 'Read But' Status on MS Discussion Documents
This wikiHow teaches you how to remove the 'Read Only' editing lock from a Microsoft Word document. While it'due south impossible to remove the read-only lock from a user-locked Word certificate if you don't know the countersign, you can easily copy the...
- Read Aloud - feature to read text in Microsoft Word
- How practise computers read documents to you?
Method i of 4:
Disabling Protected View for Online Files
-
Understand which documents are likely to be protected. Any Microsoft Give-and-take document which you download from the Internet (due east.m., an email attachment or a file from a website) will take read-only protection assigned to it whenever you open up it. You can disable this protection when outset opening the certificate.
-

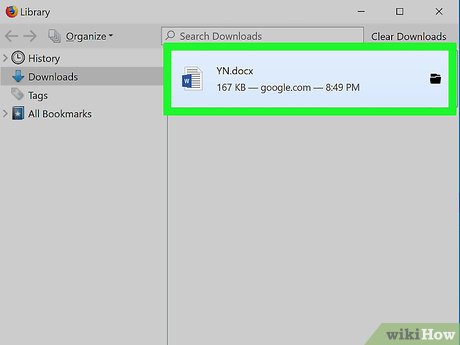
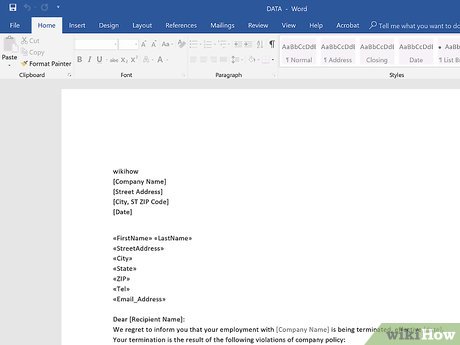
Open the Word certificate. Double-click the Discussion certificate for which yous desire to remove the read-just protection.
- If the Word document is currently open, close information technology and re-open up it.
-
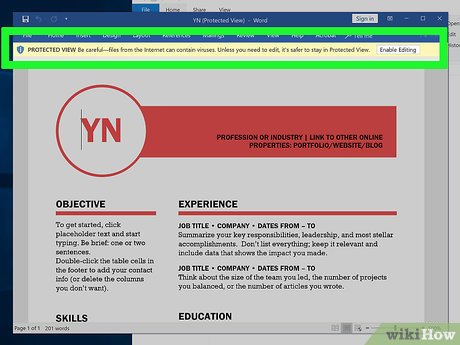
Expect for a pale yellow banner. If you see a yellowish banner with the phrase "Files from the Cyberspace tin incorporate viruses" written beyond the meridian of the Word document, your document qualifies to accept its read-only status removed using this method.
- If you don't run into this imprint even after endmost and re-opening the Discussion document, attempt one of the other methods in this article.
-

Click Enable Editing . This push button should be on the right side of the banner. Doing so will refresh the Give-and-take document and remove the read-simply protection. You should now be able to edit the document.
Method 2 of 4:
Disabling Protected View for Password-Protected Files
-

Open the Word certificate. Double-click the Give-and-take document from which you desire to remove the protection. It will open up in Discussion.
-
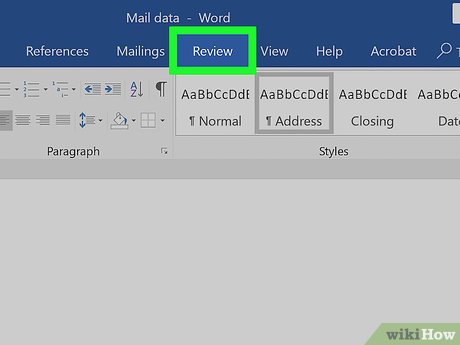
Click the Review tab. This tab is in the upper-right corner of the Word window. Doing and then opens the Review toolbar at the top of the Word window.
-
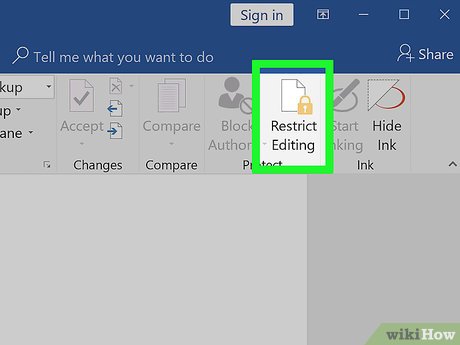
Click Restrict Editing . Yous'll find this pick on the far-right side of the Review toolbar. Clicking it prompts a pop-out bill of fare to announced on the right side of the window.
-
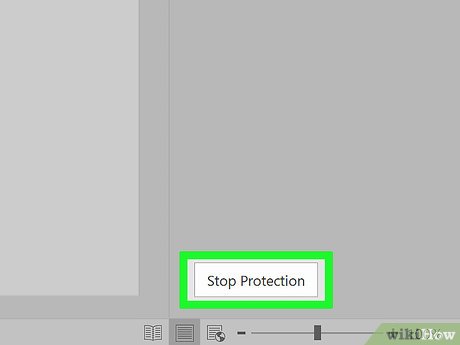
Click End Protection . It'due south at the bottom of the popular-out menu. Yous should come across a pop-up window appear at this point.
- If you or another user on your calculator'southward account created the protection without a password, clicking Stop Protection will automatically remove the protection.
-

Enter the password when prompted. Blazon the document's password into the "Password" text box, then click OK. This will immediately remove the Word document's read-simply lock if the password is right.
- If you don't know the password, you lot'll accept to copy and paste the file'due south contents instead.
-
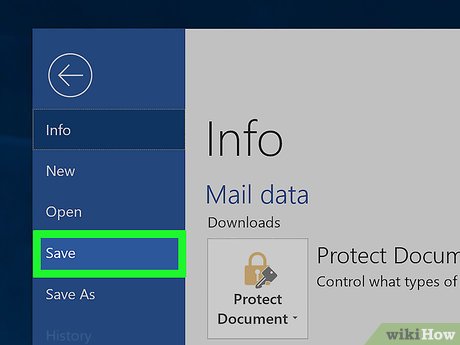
Save your changes. Press Ctrl+Due south (Windows) or ⌘ Command+S (Mac) to do so. From now on, the file won't be read-only protected unless you re-enable editing protection.
Method iii of 4:
Changing the File's Properties
-
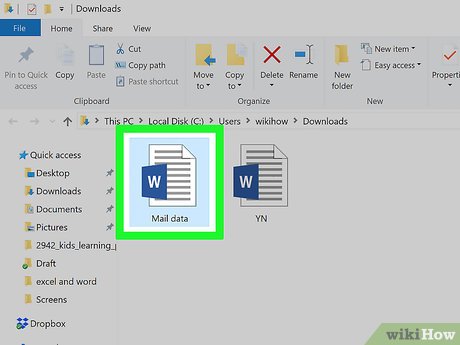
Become to the Discussion document. Discover the folder in which the Word document is stored.
- If the file isn't actually on your estimator (e.g., it's on a flash bulldoze or a CD), move the file onto your estimator before proceeding.
-

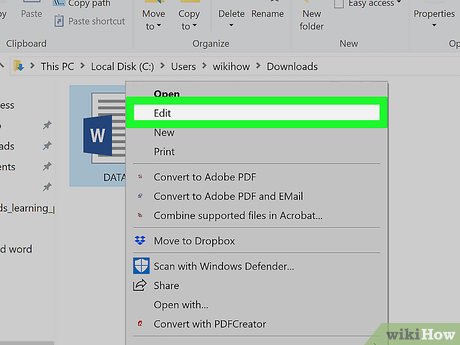
Open up the Give-and-take file's backdrop. This will vary depending on your computer's operating system:
- Windows — Click once the Word file, right-click the Discussion file, and click Properties in the drop-down carte.
- Mac — Click the Word file, click the File menu item in the acme-left side of your Mac'south screen, and click Go Info.
-
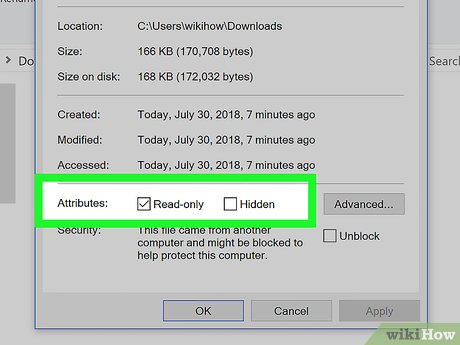
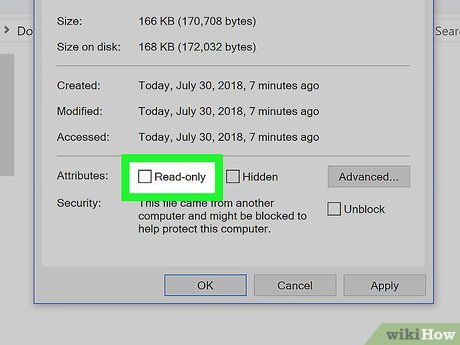
Discover the "Permissions" section. On a Windows computer, you'll notice the proper options in the "Attributes" section near the bottom of the Properties window.
- On a Mac, you'll have to click the Sharing & Permissions heading near the bottom of the window.
-
Disable the read-only protection. Again, this procedure will differ depending on whether you're using Windows or a Mac:
- Windows — Uncheck the "Read-simply" box near the bottom of the window, click Employ, and click OK.
- Mac — Click the Read pick to the right of your name, and then click Read & Write in the menu which appears.
- You may starting time have to click the lock in the lesser-left corner of the Get Info window and then enter your Mac's password before you can do this.
- If this pick is greyed out, unchecked, or otherwise not set to "Read-only", you'll have to try copying and pasting instead.
-
Try to edit the file. Open the Word document by double-clicking it, and so effort to edit it. Keep in heed that you may first have to remove the online read-only lock earlier doing then.
Method 4 of 4:
Copying and Pasting
-
Understand how this works. If your primary goal is to edit the Word certificate, yous tin can copy the Word document's text and paste it into a new Word document and then save the new certificate onto your calculator. While doing this won't remove the read-just protection from the original document, information technology volition create an editable copy.
-
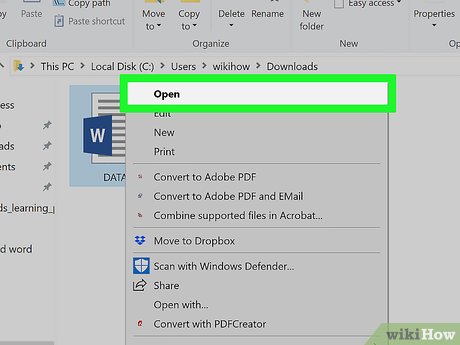
Open the protected Give-and-take document. Double-click the Word document to practice then.
-
Click anywhere on the document. This will place your mouse cursor on the document'southward page.
-
Select the whole document. Printing either Ctrl+A (Windows) or ⌘ Control+A (Mac) to do so. You should see the entire document become highlighted.
-
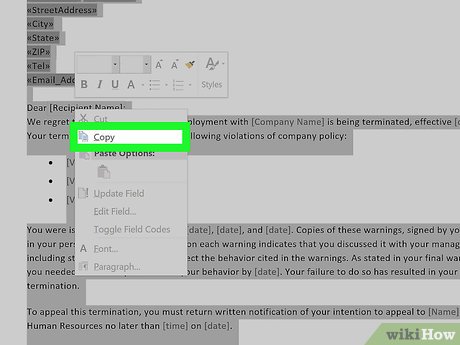
Copy the selected text. Printing either Ctrl+C (Windows) or ⌘ Control+C (Mac). This will copy the document'south text to your calculator'due south clipboard.
-
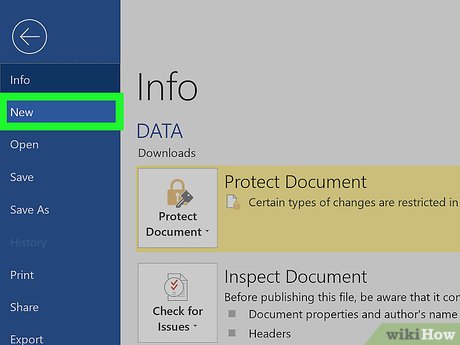
Open a new Word document. Click File in the upper-left side of the Word window, click New on the left side of the window, and click Blank certificate to open up a bare Word document.
- On a Mac, click the File menu item, so click New Blank Document at the pinnacle of the drop-downward carte du jour.
-
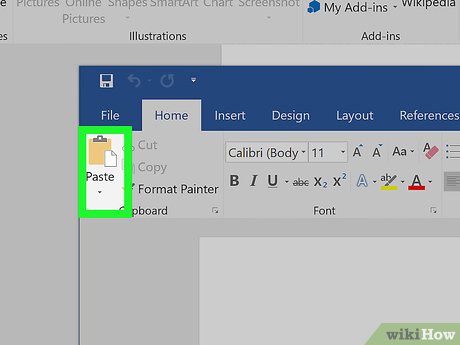
Paste in the copied text. Printing either Ctrl+Five (Windows) or ⌘ Command+V (Mac) to paste the locked Word document's text into the bare document.
- This may take a few seconds if the original certificate was particularly big or contained images.
-
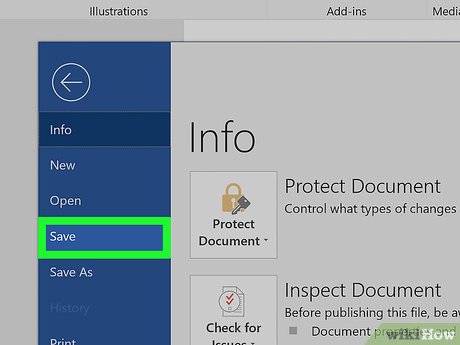
Salve the document every bit a new file. Printing Ctrl+Due south (Windows) or ⌘ Control+S (Mac), then enter your document's proper name and click Relieve. You'll be able to edit the certificate you only created like usual.
earlsoripsensfuld.blogspot.com
Source: https://tipsmake.com/how-to-remove-the-read-only-status-on-ms-word-documents
0 Response to "How to Turn Off Read Only Feature"
Post a Comment